Explain OAuth2 to me like I'm Five
Overview
I had to learn about OAuth2 for work. I’m going to do a talk about this for other engineers. However, writing this down will not only help me, but help other engineers trying to understand how OAuth2 works and when it’s appropriate to use it. Let’s start with a story.
Disclaimer: I’m not a security expert. This article is not advice and any actions you take should be validated with a real security professions familiar with these systems before use. Use this advice at your own discretion. Not responsible for security or other issues.
Once upon a time…
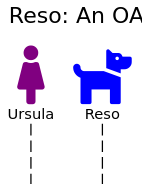
There was a very busy woman named Ursula. Ursula was a spy. Bad guys were always out to get her. You never knew who was listening to her phone calls. During the pandemic, Ursula had adopted a cute fur-baby puppy named Reso. A rambunctious young K9, Reso needed lots of walks to keep his energy and chewing in check, but Ursula had to work a full time job. Whatever is Ursula to do?
“I know!”, said Ursula to herself. “I’ll hire a dog walking company!”
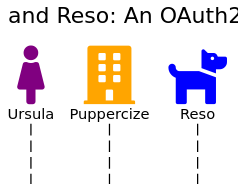
After considering many companies, Ursula chose “Puppercize” even though they were on the other side of town. That didn’t matter because their company was enrolled in a new system of special keys.
Ursula is pretty savvy. She spent some money a couple of years ago on a new door lock system called OLock2, an improved version of the old OLock. She has a lock on her front door, back door, garage, and a door to a room where Reso stays during the day.

The keys to the OLock system are special because they’re made of ice. They’ll slowly melt over time and stop working.

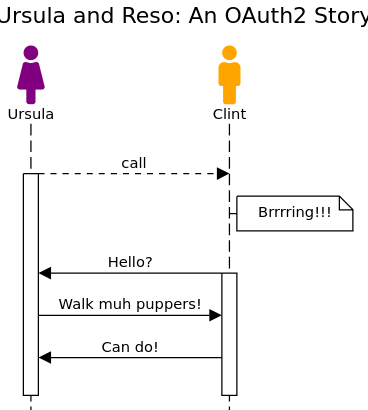
Ursula picked up the phone and called Puppercize. Clint, the Puppercize Service Rep, picked up. “Hello?”
“I need you to walk muh puppers,” asked Ursula in an oh-so Millennial fashion.
“Can do!” said Clint. “But, I need one of each: an Access and a Refresh key from your house.”
“Hmmmm,” despondently replied Ursula. “I live pretty far away. How can I get you those keys?”
“Well,” beamed Clint. “Your OLock2 system can let me in if you give me a temporary code. Here, I’ll give you an invoice number so that we know we’ve got the right house. I’ll also give you a verifier so that in case someone is listening to this call I can prove I made up the verifier to your lock system. This verifier is actually created with a secret I won’t tell you, but will be easy to check by your printer.”
“Sounds good!” Ursula excitedly replied. “Hold on one moment.”
Ursula went to her 3D ice-key printing system and asked it for a one-time secret passcode, and it had the work order and verifier added to it. The OLock system responded with the code.
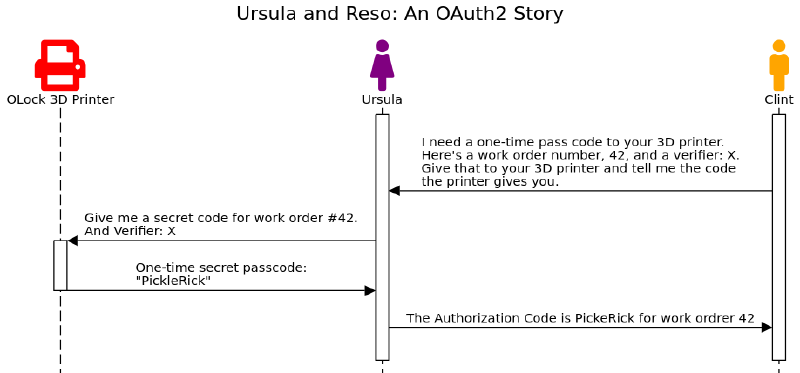
“Are you ready?” asked Ursula? “The Authorization Code is PickleRick for work-order 42.”
“Thanks,” replied Clint.
“Oh, one more thing,” added Ursula, “There is a 3D ice-key-printer in the backyard.”
“Great!” says Clint. “We’ll send someone over as soon as I get back to the Walk Action Guild.” Clint and Ursula hangup. Ursula heads to work, Clint heads to the guild.
Clint returns to the WAG and tells the secret code and the secret for the verifier to their first available dog walker, Deli, who then makes their way to the house.
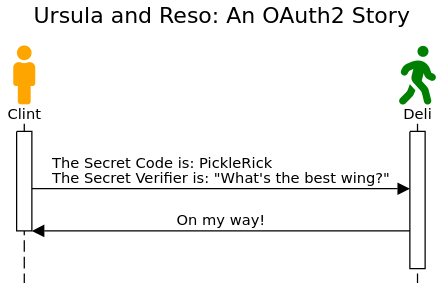
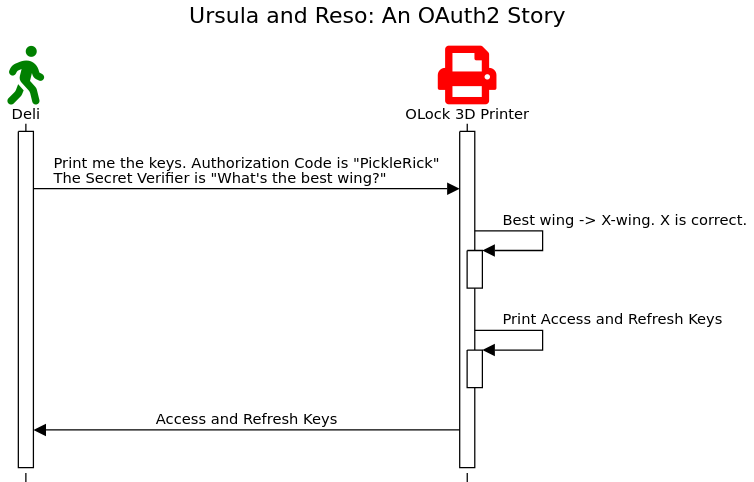
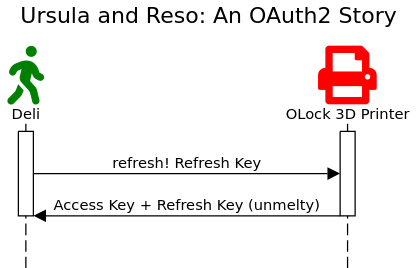
When Deli arrives at Ursula’s house, Deli approaches the 3D printer and inputs “PickleRick” into the OLock2 system along with Clint’s secret verifier: “What’s the best wing?”. The printer, an avid StarWars fan, agrees that the best wing, is an X-wing. The printer whirs and jostles. Out pops two ice-keys: an Access for the door, and a Refresh for the 3D printer.
The walker uses the Access Key to open the door to Reso’s room and takes the excited pup for a walk.
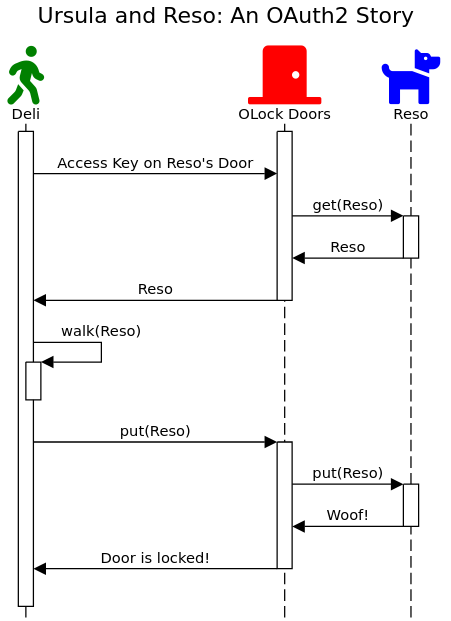
After walking Reso, Deli returns to the house and uses their key to let Reso back into the room. Deli noticed a problem, though. Both keys had started to melt. The key almost didn’t work in the door! Deli decides to refresh the keys.
They went to the backyard, and put the Refresh Key into the 3D printer, and out popped two new, un-melted keys.
Deli returned to the WAG and put the keys into the freezer. Ursula pays Clint. Clint pays Deli. Reso got his walks. Everybody lives happily ever after.
The end.
Now you understand the OAuth2 Authorization Code Flow with Proof Key Code Exchange!
OAuth2 roles
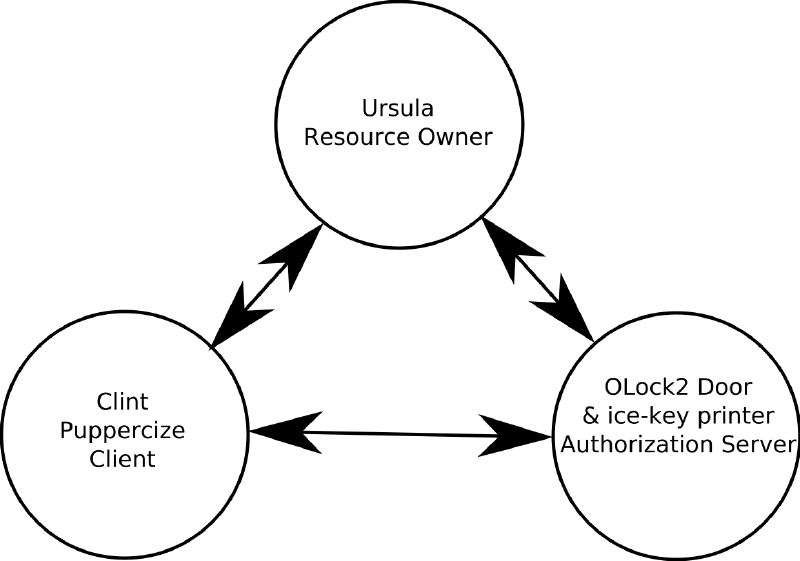
In the above story, the names of the characters were largely taken from the RFC spec if their name sounded similar to the role name.
- Resource: Reso, the dog
- Resource Owner: Ursula (“user”), owns the resource, Reso
- Client: Clint, Dog walker representative that asks and receives keys
- Delegate: Deli, the dog walker, who is delegated the use of the keys
- Authorization Server: OLock2, Door lock system + 3D printer.
- Access Token: key made of ice that opens a door
- Refresh Token: key made of ice that operates the 3D printer to print new keys
- Scope: the various rooms protected by the doors: dog’s room, garage, kitchen, etc. Keys can be scoped to rooms by encoding the scope or biting to the key.
The Details
Now that you have the story, let’s get into the nerdy details.
What is OAuth2?
It’s a standardized REST API for to share resources owned by users from a system managed by one organization with another organization. You can read the original OAuth2 specification and how to use the resulting tokens as Bearer Authenticate 1 headers here.
OAuth2 allows a web browser running on the user’s system to grant access to these resources to the other organization.
It has some cool features:
- Authorization occurs via a series of HTTP RESTful calls
- Authorization is time-limited
- Authorization time-limits can be requested to be extended
- Authorized actions can be limited in scope
What isn’t OAuth2?
OAuth2 is great, but it leaves a lot of implementation details out because it only concerns authorization access to resources. It says nothing about how to authenticate users or clients. The Access Token is opaque and contains no inherent format or information, it could simply be a session ID. It has no concept of Scopes. Without the OpenID Connect (OIDC) Core Extension, it doesn’t even have a way of telling you who the client is acting on behalf of.
Wait, I don’t know which Resource Owner asked?
Nope! This one threw me for a loop, too.
Based on the OAuth2 spec, the answer is no, you don’t. However, some Authorization Server providers can embed the Resource Owner in the token or allow you to inspect the token to further restrict actions Clients can take based on the Resource Owner.
Roles, explained
OAuth2 has a few roles that parties play. Here’s how they all fit together.
Resource
This is the thing you’re granting access to. In our story, it was the dog so that he could be walked. If your app, it could be a file. Or an action to take on behalf of the owner.
Resource Owner
Usually a human, organization, or role that owns resources hosted by a Resource Server.
Resource Server
This stores or manipulates resources for the Resource Owner. It also enforces if the action is Authorized. As such, to use OAuth2, this service will need to be given OAuth2 Bearer tokens, and it will need to independently validate them. If you have opaque Access Tokens, the Resource Server will need to ask the Authorization Service if it’s a valid token. But if your Access Tokens are JWT’s, you can skip that query. By looking up public keys in the JSON Web Token Key Server the application itself can validate the signature locally and then trust the contents to restrict what the bearer of the token can do.
Client
This is a confusingly named role, but this is the application that the Resource Owner is trusting with the access to the resource. This can be a web application running on a server. It can be a React Native application running in the Resource Owner’s browser. It can even be a Command Line Interface (CLI) application running from a terminal.
There are different “Flows” or authentication algorithms you can use and which one depends on whether you can keep credentials secret on untrusted devices. We’ll get into Flows later.
Delegate (not really part of OAuth2)
Clients can take these Access Tokens and give them to other applications or processes if they want. Because the Resource Servers only make the decision based on the token presented to them, clients can delegate other applications to act on their behalf by simply disclosing the token. Because the tokens expire after a short amount of time, the delegate status will be revoked after enough time has passed.
Authorization Server
This is the service that grants access to resource by generating Access and Refresh Tokens. It’s involved in granting access and verifying that the original Client and Resource Owners who requested the access get them by using what’s called a “Flow”.
Tokens: What’s this all for?
At the end of the day, a Client wants to access some Resource. It will need an Access Token to do this. However, there are a few types of tokens:
- Access Token: These grant access to a resource to the client that presents them to a Resource Server. All Flows should result in getting one of these. Access Tokens are just (opaque) blobs with no inherent meaning, according to the OAuth2 standard. For some providers, like Okta, these can be JWT’s that you can validate and extract fields out of. Access Tokens merely tell Resource Servers that the holder is allowed to do something, but not who the bearer is.
- Refresh Token: These grant access, not to a resource, but to obtain new Access Tokens that have an expiration date further into the future. Refresh Tokens can themselves expire, so you can use a Refresh Token to obtain a new Refresh Token before it expires so that you don’t have to ask Resource Owners for permission again.
- OpenID Token: This is a separate token from Access Tokens. It’s intended to convey to client’s information about the Resource Owner. It tells them who they’re acting on behalf of. Clients consume OpenID Tokens. Resource Servers consume Access Tokens.
Flows, explained
OAuth has a set of things called “Flows”. It’s another confusing name for “how to give an Access Token to a Client”. Just remember that all flows are about granting Clients access to resources. There are multiple flows with varying levels of security for various situations in which your app is expected to be. All flows have two major parts: The Resource Owner Grants the Client access, Client Exchanges the grant for an Access Token.
At the end of each flow, the Client always ends up with an Access, OpenID, and/or a Refresh Token.
Authorization Code Flow
This flow is named after the Authorization Server given an Authorization Code to the Resource Owner and expecting it back from Clients later. In this flow, the Client application is “secure”, meaning it can keep secrets out of public view. As such, you should not see this flow used in React Native or mobile device applications as this flow requires the Client Secret to authenticate itself.
- Start: Resource Owner attempts to grant access to a Client, usually by asking the Client to initiate the flow (clicking a button on an application or web page)
- Client generates a hard to guess “state” variable
- Client will redirect the owner’s web browser to the Resource Owner’s Authorization Server’s
/authorizeendpoint with the generated state and a redirect URL back to the Client’s web server - Login: Authorization Server will
- Authenticate the user’s credentials if not already logged in
- Perform a Multi-Factor Challenge (if enabled and not already logged in)
- Consent: Ask Owner if they want to grant access to the Client
- Grant: If the Owner grants access, Authorization Server will generate a hard to guess “Authorization Code” and return that back to the Resource Owner’s Browser as a parameter in the redirect back to the Client’s web server.
- Client verifies that the state parameter hasn’t changed (this is useful for ensuring that there’s no person-in-the-middle attack and in case the Resource Owner made more than one request in a short time)
- Exchange: Client then connects to the Resource Owner’s Authorization Server to Exchange the Authorization Code for an Access Token by sending the Authorization Code to the
/tokenendpoint of the Authorization Server. - Authorization Server gives back and Access Token
- Client uses the Access Token to act on behalf of the Resource Owner with a Resource Server
- (NOT PART OF OAuth2!) Resource Server validates the Access Token by validating the JWT, or by asking the Authorization Server using the
/inspectendpoint
Yes, that last step isn’t actually part of the OAuth2 specification. That means that this process is not standardized. The industry seems to be moving to use JWT’s but that’s not officially supported by RFC6749. Who ever is hosting your Authentication Service will need to help you validate Access Tokens.
Implicit Flow
The Implicit Flow is deprecated and should be replaced with Authorization Code Flow with Proof Key Code Exchange (PKCE) for Browsers and Clients that support it. If you can’t generate a SHA256 hash for some reason, some servers still support it, but there’s an exploitable flaw in this flow that could lead to some 3rd party intercepting the Access and Refresh Tokens.
This flow is deprecated, so I won’t cover it as you shouldn’t really be using it anymore.
Authorization Code Flow with Proof Key Code Exchange (PKCE)
This flow should be used instead of Implicit Flow if possible. It’s identical to the Authorization Code Flow, except you don’t need to pass along the Client Secret. Instead, a hard to guess “code verifier” and “code verifier challenge” is used to prove that the original Client that made the access request is the same one exchanging the Authorization Code for an Access Token. Here’s how a simple request could play out in an OAuth2 Authorization Code Flow with PKCE.
Using this method, you create an anonymous Client with no Client Secret that can get Access Tokens and then access Resources. It’s really useful if you don’t want to have a separate
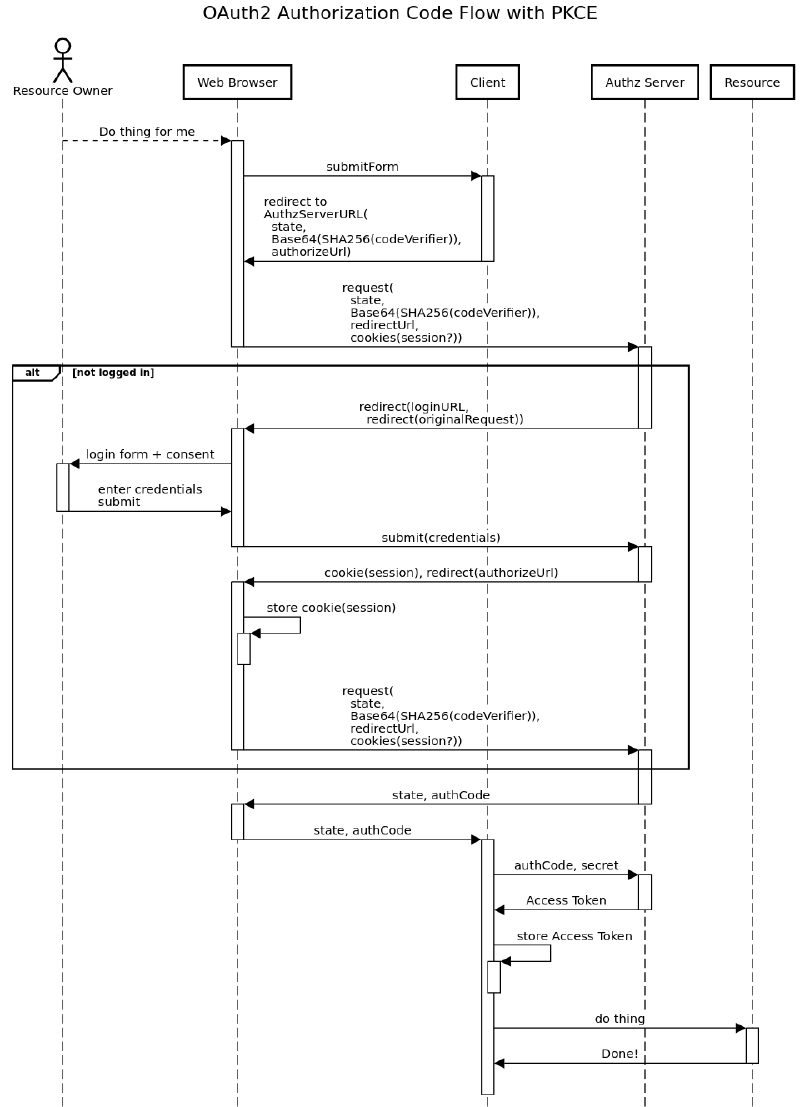
- Resource Owner asks the Client to perform an action on their behalf
- Start: Web Browser sends the request to the Client
- Client generates and sends a redirect request to the Web Browser:
- A “state” secret, which the Client can use to ensure it’s attempting to Exchange the correct Authorization Code for later
- A “code_verifier” which it remembers for later, but keeps a secret
- A “code_challenge” which is the Base64-encoded SHA256 hash of the code_verifier
- The Client then starts or sets up a web server to listen for the redirect back from the Authorization Server in a future step
- Browser redirects to the Authorization Server’s
/authorizeendpoint - Login: Authorization Server will check if the Owner is logged in
- If the owner is not logged in it prompts for credentials and Multi-Factor authentication, if configured
- Grant: The Authorization Server will also present the Resource Owner with a consent screen (if configured) to ask them if it should grant this Client access to the Resources.
- When the Owner indicates it should grant access, the Authorization Server redirects back to the Client’s web service from step 4. More on this later.
- The Client obtains the Authorization Code from this redirect.
- Exchange: Client then sends the Authorization Code and code_verifier to the Authorization Server’s
/tokenendpoint - The Authorization Server ensures that both the Authorization Code is valid and code_verifier matches the original code_challenge from step 3.3.
- Authorization Server gives the Client the Access Token.
This flow is really neat because it allows for React Native or other untrusted environments, such as mobile applications, to obtain Access Tokens for use for a short time. Should the application or device be compromised, the damage will be time-boxed, limiting the potential blast radius (if detected ;) ).
The big difference, the “code_verifier” and “code_challenge” are used to ensure that the same request made by the Browser in step 5 is being redeemed by the same Client in step 10. The secret code_verifier generates a “Proof” that you know the “Key” ahead of the request, and it’s unlikely anyone could have guessed your code_verifier secret to impersonate your be in the middle of your Client application and the Authorization Server.
Resource Owner Password (AKA: Password Grant)
Pretty much what’s on the tin. The Client will ask for the Resource Owner’s username and password. This defeats the purpose of OAuth2, but is useful for debugging new Authorization Servers. You should never use this in a production system if you can help it, in my opinion.
Client Credentials
In this Flow, the Client is attempting to access Resources that it owns. In this case, the Resource Owner and the Client are the same thing. The Client is using its own secret to obtain an Access Token for a resource. This is useful when attempting to access API endpoints on the Authorization server.
You won’t see this much in the wild, but it could be useful if the client wants to make API calls to endpoints that support OAuth2 Bearer Tokens and needs an Access Token. This is only suitable if the Client is operated securely so that the Client Secret contained within the service cannot be leaked.
Device Code
With Device Code Flow, your Client could be some app you’ve written that’s running on some “device” with limited input or presentation capabilities. The device could be a smartphone, tablet, or embedded system with only a display. Device Code is a way of passing Access Tokens directly to a Client that has no input, or cannot open a Web Browser for the Resource Owner to interact with.
In this flow, the Client will periodically check or poll the Authorization Server to see if the user granted the access. It’s never given an Authorization Code directly. The Resource Owner is given a URL or a QR code to take to a system with a Browser and input device so that they can log in and grant the Access Token to the Client.
As this flow gives an Access Token to the Client, the Client needs to be able to secure the Access token. As such, I wouldn’t store the Access Token on a mobile device like a phone. But if this was a Router or an embedded system, this could be a neat way to authorize that device to get access without extra input hardware.
Refresh Token
This Flow avoids asking the Resource Owner to grant the Client another Access Token. OAuth2 doesn’t specify how refresh tokens are to be requested. Authorization Servers can give them out all the time, or be configured to only give them out to certain Client ID’s, or require the Client to ask for them.
Okta uses a custom scope called “offline” to indicate that a Refresh Token is desired by the Client.
In the Refresh Token Flow, instead of asking for a straight Access Token, during another flow, like Authorization Code or Device Code, and specifying the scope of “offline”. When this is specified, you’ll get a Refresh Token in addition to the regular Access Token.
- Client sends a request to the
/tokenendpoint with the refresh token included - Authorization server sends back a fresh Access and Refresh Token
Since the Client has to store the refresh token securely, otherwise an evil actor could produce infinite Access and Refresh Tokens until revoked, this only works if you can store the Refresh Token securely. That is, it only works if your Client is an application server under your control. You can’t store this in a mobile application or React website as another app or web page could extract this token from the device or browser store and impersonate the Client. Bad day.
Useful Extensions to OAuth2
As said before, OAuth2 is fairly limited, but it’s had a few additional extensions created for use with it. Not all Authorization server providers support them, but if yours does, you can take advantage of additional information passed among the parties and roles.
- Original OAuth2 Specification
- Bearer Authenticate
- Proof Key for Code Exchange by OAuth Public Clients (Authorization Code + PKCE)
- OAuth2 Token Introspection
- OpenID (OIDC) providing Authentication information to Clients
- OIDC Discovery Auto-configure your OAuth2+OIDC Clients.
- JSON Web Key
- JWKS JSON Web Key Server
- JWT Token Exchange
-
Yes, using the HTTP Authenticate header is confusing as Access Tokens concern AuthORization and not AuthENtication, but this header pre-dates when most developers considered these separate concerns. ↩︎
